Appearance
Form Automations
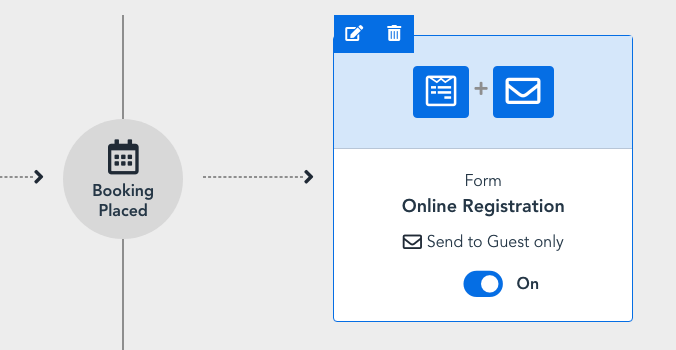
Form Automations have at least 2 parts to their content:
- The Form Template - the "blueprint" that creates Forms for Bookings
- The Email Template - the template for emails that are sent to the guest requesting that they fill in the Form
There can also be an optional 3rd part, an SMS Template, if you wish to send an SMS message to the guest to fill in the Form.
This page deals with Form Templates in depth. Read the next page on Email Automations for details on editing the emails requests to guests to fill in Forms, and the SMS Automations page for details about sending SMS requests.
Our Forms Templates & Forms are smart - they adapt to the booking and guest details, and have other smart features - and they are completely configurable.
Overview
There are a number of parts that make up the page and experience for a guest filling in a form:
- The Booking Summary shown to the guest before filling in the form (optional, set when creating or editing the Automation). This must be turned on to show the guest the Welcome And Thank You Messages.
- The Welcome Message shown before filling in the form (optional)
- The Form itself
- The Thank You Message (optional)
Editing a Form Template is divided into 2 steps - editing the Welcome and Thank You messages and editing the Form content. You can do them in any order, and can update them incrementally.
PRO TIP - FIND OUT EARLY ABOUT POSSIBLE AMENDMENTS
We've found it's a very effective to include a Booking Summary for the first Form that a guest has to fill in.
Why? Because guests who make Bookings on some channels (e.g. Booking.com) often change their guest allocation or child ages after booking but before check-in. By including the booking summary, the guest has to confirm the details before they can fill in the form. They can also request an amendment, and if they do you will get an early warning - an email and the booking will be marked as requesting amendment.
So, find out sooner rather than later, and make sure you're taking the correct deposit.
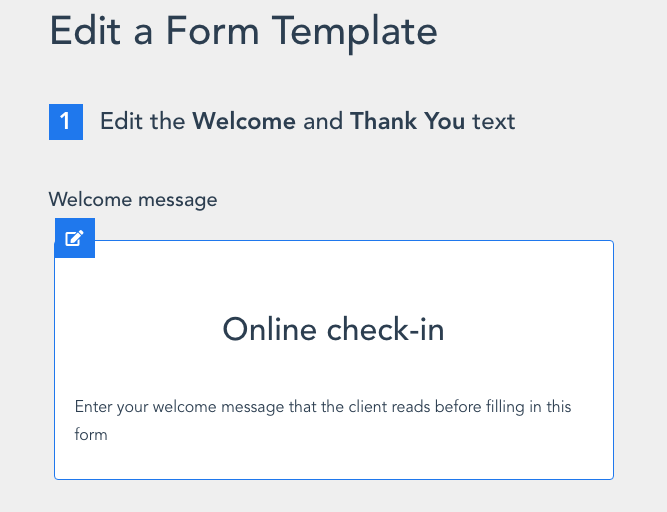
Step 1: Editing The Welcome And Thank You Messages
These messages are shown to the guest before and after filling in the form, respectively.
When you first open your Form Template you will see the Welcome and Thank You messages as they will appear to guests. The welcome message will include your page header image (see how to select a page header image).
To edit, hover over either the Welcome Message or Thank You message and click on the edit button in the top left:
Clicking on the edit button will bring up the edit dialog:
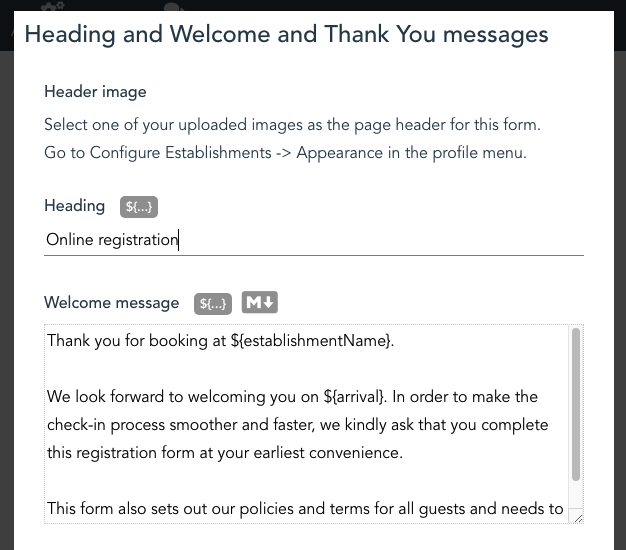
You will notice that next to the headings for the fields are a couple of buttons:
- The Personalisation button you can use to help you insert personalisation data such as the arrival date, into the message. Read more about using Personalisation variables in content.
- The Markdown button tells you how to add basic formatting on your content, such as making text bold and adding external links (not available for the Heading field). Read more about using Markdown in content.

Step 2: Editing The Form Content
"Edit the Form" is where you edit the actual Form, and it shows a close approximation to what the guest will see. A Form is composed of Sections, and each Section should contain one or more Questions.
If the Form you are editing was copied from a system Form (typically during onboarding), the Form should already have Sections and Questions.
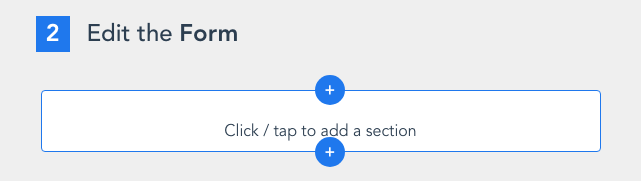
If not, you will have an empty Form, and will start by adding the first Section. Hover over the box titled "Click / tap to add a section", and click on one of the "+" signs, shown below:
Sections
Adding a Section or clicking on the edit button will pop up the The Edit Section dialog:

There are 5 different types of Sections
- About the trip
- Questions for each guest
- Questions about each room
- Terms & Conditions
- Other
Types 1, 4 & 5 ("About the trip", "Terms & Conditions" and "Other") are general sections, and differ slightly in appearance.
"Questions for each guest" is unique in that it will be repeated for each guest in each room - e.g. if the booking is for 2 adults and 2 children, there will be 4 "copies" of this section in the form the guest fills in - one for each guest. This is the type of section you should use to ask questions about guests, such as names, contact info, dietary preferences etc.
"Questions about each room" is similar, and will be repeated for each room rather than each guest.
Introductory text
This text will appear under the Section Heading, and you can use Markdown to add styling to the text, and external links.
Add another Section
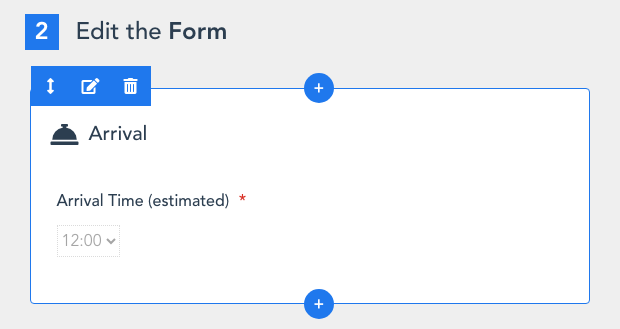
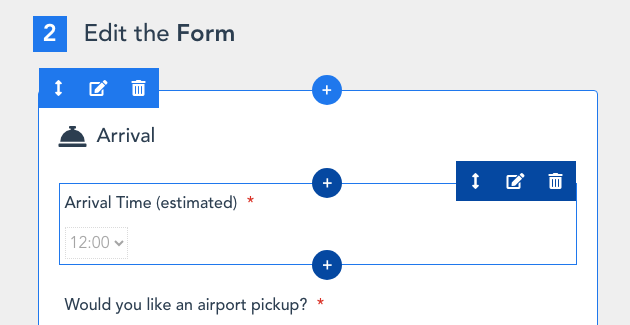
To add a Section above or below an existing Section, hover over the existing Section, and click on the appropriate dark blue "+" button to add the new Section above or below the existing one:
Questions
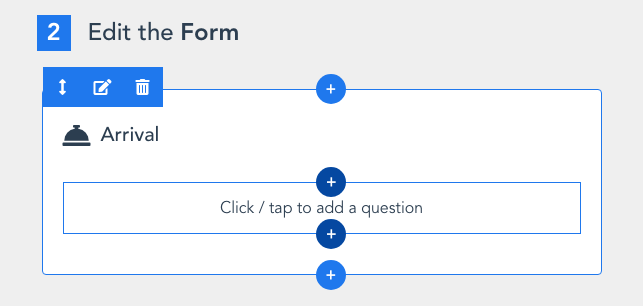
A new Section will have no Questions yet. Hover over the "Click/tap to add a Question" block in the Section and click on a dark blue "+" button to add a Question:
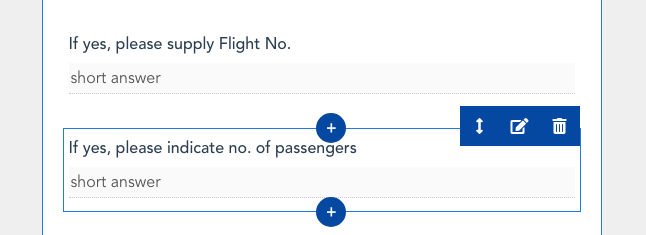
If your Section already has Questions and you want to add a Question above or below an existing Question, hover over the existing Question, and click on the appropriate dark blue "+" button to add the new Question above or below the existing one:
You can then choose to use an existing template Question from our library of Questions, or start from scratch with a blank Question.
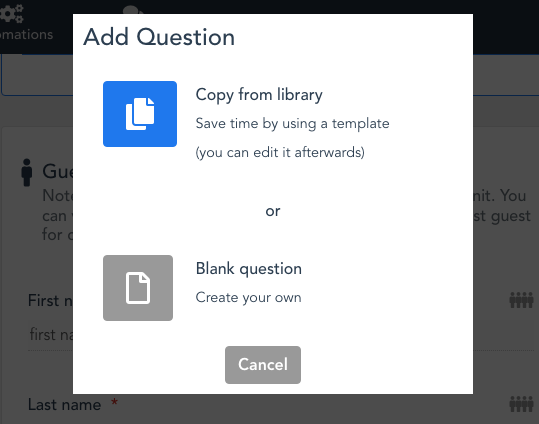
The Add/Edit Question dialog is used to edit the details of a Question:
TIP
Save time by first checking if the question you would like to use is in our library.
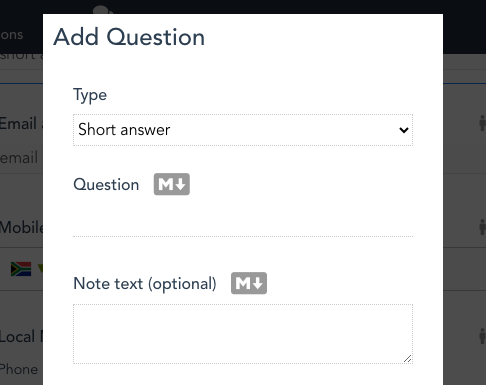
Anotomy of a Question
There are 8 possible properties of a Question:
- The type of Question
- The Question - what is being asked, and you can use Markdown for formatting
- Note text - This is supporting text that will appear below the Question, and you can use Markdown for formatting
- Which guests do you want to ask? (only for Questions in a Section of type "Guest Information") - Show this Question to all Guests, or a subset (e.g. first adult only)
- Required - if ticked, the Guest will see a red "*" next to the Question, and they will not be able to submit the from until this field is completed.
- Copyable (certain types only) - if ticked, the Guest can save time by using a copy button to duplicate a previous answer without typing it out by hand.
- Answer options (certain types only) - you provide the possible answers the Guest can choose from
- Message on error / empty - this is shown when a required field is empty or invalid
Types of Questions
There are wide range of types of Question. Each will display differently to the Guest, and will have different validation rules (eg. email address must be a valid email address).
Guest Questions:
- First name
- Last name
- Email address
- ID / passport number
- Date of birth
- Country
General Questions:
- Short answer (single line)
- Paragraph (multi-line)
- Checkboxes - will allow multiple selections (or one if you only have one option). If required, the guest will have to select at least one.
- Multiple choice - will only allow one selection. If required, the guest will have to select one.
- Dropdown - single selection
- Date
- Time
Different Questions for different guests
Sometimes you need to ask questions of some guests, but not all - and generally guests prefer to fill in shorter forms. Limit who you ask Questions of. Options are:
- All guests
- First adult in each room
- Second adult in each room
- First and second adult in each room
- Children only
TIP
Don't ask unnecessary questions - use "Which guests do you want to ask?" to skip some questions for children, or from the second adult onwards.
Reordering Sections and Questions
You can reorder Sections or Questions by clicking and dragging on the reorder button (up and down arrows) on the Section or Question, or simply clicking anywhere in the Section or Question and reordering as you see fit.