Appearance
Creating & Editing Automations
Creating An Automation
To create an Automation, click on one of the "Add an Automation" buttons in the Automations column, and the Add Automation dialog will appear.

Fill in the fields:
- give your new Automation a name, and
- if needed you can change the flow (Booking timing) that drives the Automation
- select the type of Automation you want to create, and
- decide on the day and time when you would like to the Automation to run
- very often Automations apply to all Bookings, but you can set Conditions to limit your Automation to certain Bookings only
Save your Automation and it will appear in the Automations column.
TIP
Newly created Automations are turned off by default and their communication mode is set to Host only. You will need to edit the Automation's content and toggle them on before they will trigger on bookings.
Extra Properties For Form Automations
Form Automations have 2 extra attributes that appear in the Add Automation dialog when a Form Automation type is selected:
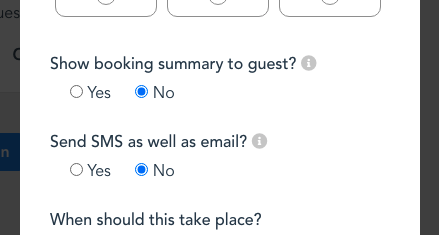
- "Show booking summary to guest?" - default: "No". When this is "Yes", the guest will see a summary of the booking before filling in the form.
- "Send SMS as well as email?" - default: "No". When this is "Yes", an SMS will be sent in addition to an email.
Here is a screenshot of the extra properties:
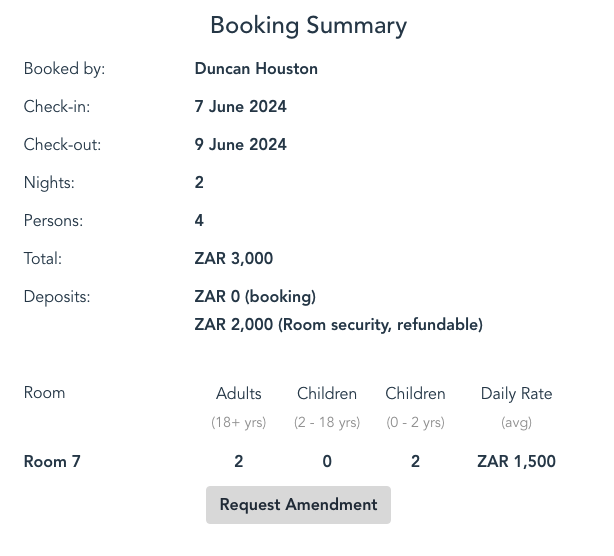
An example of a Booking Summary shown to the guest before they fill in a form:
Extra Properties For Upsell Automations
Upsell Automations have 1 extra attribute that appears in the Add Automation dialog when an Upsell Automation type is selected:
- "Send SMS as well as email?" - default: "No". When this is "Yes", an SMS will be sent in addition to an email.
Editing An Automation
There are 2 parts to editing an Automation:
- editing it's settings, and
- editing it's content
Editing Automation Settings
Hovering over an Automation (or tapping on mobile) will reveal the buttons to edit, duplicate or delete an Automation. Click on the edit button (left), which will show the Edit Settings dialog.

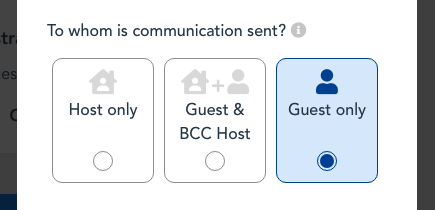
Most of the settings will be the same as those available when adding an Automation. There will be a new property, "To whom is communication sent?".
"To whom is communication sent?"
There are 3 communication modes for Automations:
- Host only
- Send to Guest and BCC Host
- Send to Guest
Selecting a communication mode
New Automations start in Host only mode (with the exception of SMSs and WhatsApps). In Host only mode, the communication is sent to you and you need to forward it to the guest. The reason Automations start in this mode is so that you can see what the communication to the guest looks like before setting the Automation to send to the Guest automatically, using either the "Send to Guest and BCC Host", or "Send to Guest" mode. We suggest changing to one of the other modes as soon as you are happy with the content.
Editing Automation Content
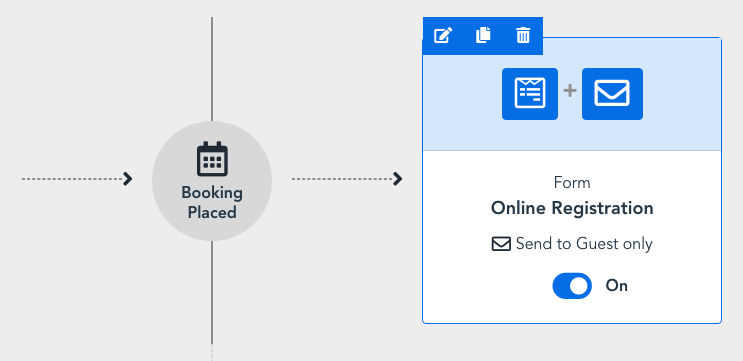
The content buttons are in the top half of the Automation, and will differ depending on the type of Automation.
e.g. hovering over a Form Automation highlights the edit buttons at the top (form and email):
Toggling An Automation On or Off
All Automations start off turned off. This is because you will need to add content and perhaps tweak other settings before letting the Automation work on bookings and send communication to Guests.
Duplicating an Automation
Use the duplicate / copy button to duplicate an Automation. This will copy the Automation, it's settings, as well as the associated content such as Emails and Forms.
TIP
This is a quick way to set up multiple Automations that differ slightly - for example different forms for different booking sources (where the booking source is used in Conditions). First setup one Automation fully, then duplicate this and change the settings or content for the new Automation. Apply one or more Conditions to each Automation.
Deleting An Automation Deletes Tasks
When you delete an Automation, all the associated future Tasks (Tasks that have been scheduled to execute in the future) will be deleted. Tasks that have already executed will not be deleted, as this represents "history" that we don't want to lose.
Advanced topics
Conditions For Automations
Automations will by default be applied to all Bookings. If however you only want an Automation to apply to Bookings made via certain channels, or have different variations of an Automation for Bookings from different Channels, you can add Conditions to an Automation. You can do this when adding an Automation, or later when editing an Automation.
We stack duplicated Automations next to each other to make it easier to understand.
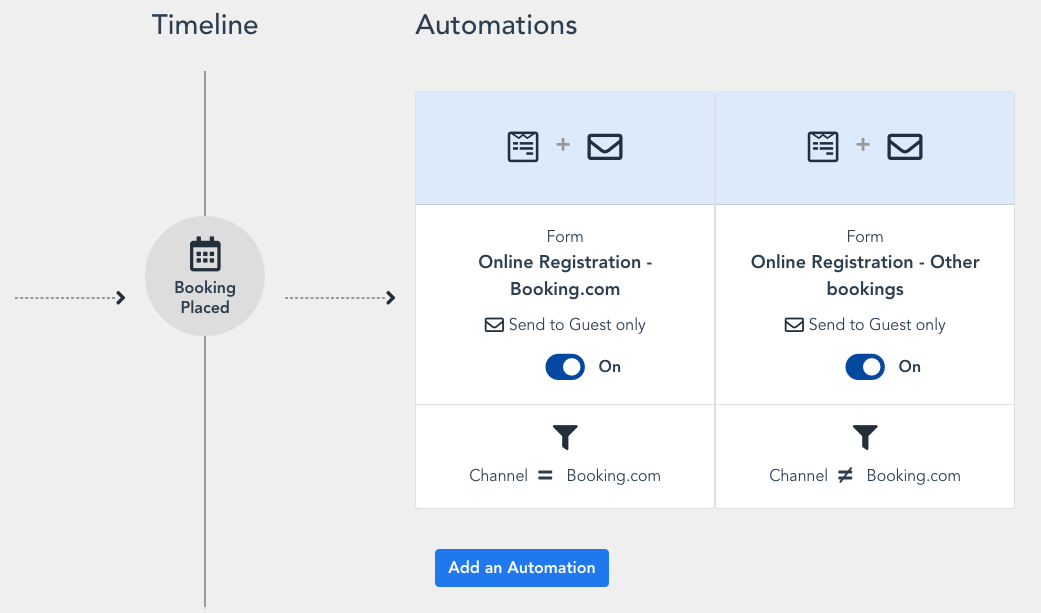
To be stacked next to each other, they need the same: type, send time and communication mode.
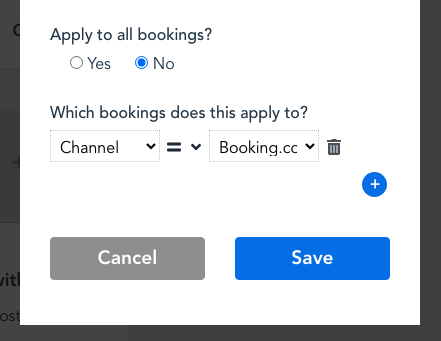
To add a Condition, open the Settings Dialog and scroll to the bottom of the dialog. Change "Apply to all Bookings" from "Yes" to "No". The first Condition will appear.
A Condition has 3 parts:
- The Type
- The Operator
- The Value
For example: adding a Condition with Type “Channel”, Operator “=“ and Value “Booking.com” would match bookings from Booking.com.
You can add multiple Conditions to an Automation, which is useful if you are going to have more than 2 types of Automations.
TIP
If you have more than 2 Automations, you will likely need a "catch all" Automation that caters for Bookings that don't match other variations. Very often this will have multiple Conditions that are the opposite of Conditions on the other Automations.
Toggling Automations
When you toggle an Automation on, there are some advanced features you can use.
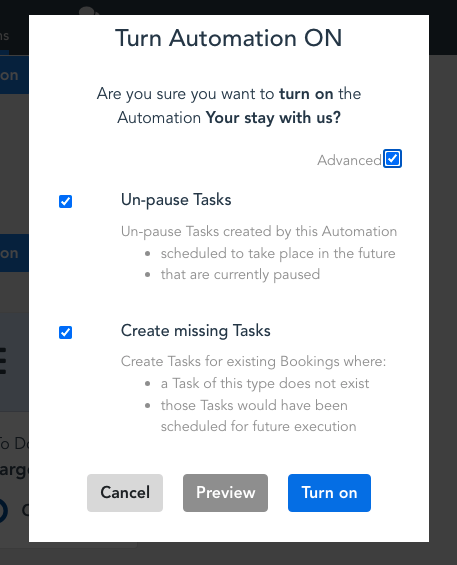
When you turn an Automation ON, by default 2 things happen:
- Paused Tasks are unpaused - all future Tasks that were created by the Automation and that are paused, will be unpaused
- Missing Tasks are created - all Bookings that don't have a Task created by this Automation, will have a Task created. This will be the case for all forward bookings the first time you turn an Automation on, but will only apply to tasks that would normally be created for future execution. For example, Tasks that would execute immediately when a Booking is placed, will not be created for forward bookings.
The above 2 steps ensure that the Automation is applied to all future bookings.
When you turn an Automation OFF, by default the following happens:
- Tasks are paused - all future Tasks that were created by the Automation and, will be paused
Selecting Advanced behavior
If you would like to control the above behaviours (creating, unpausing and pausing), you can turn them off by showing the advanced settings when you tick the "Advanced" checkbox, as can be seen below:
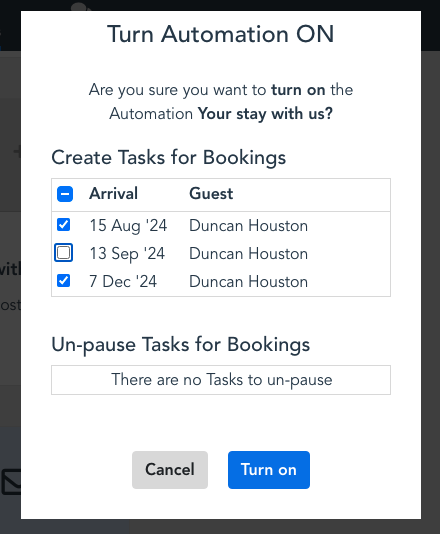
Previewing
Before toggling an Automation on or off you have the option to preview which bookings will be affected - tasks that will be created and un-paused when toggling an Automation on, and tasked that will be paused if you are toggling an Automation off.
Whilst previewing, you can select which bookings you would like the toggle to apply to, by ticking or unticking the checkboxes corresponding to the Bookings.